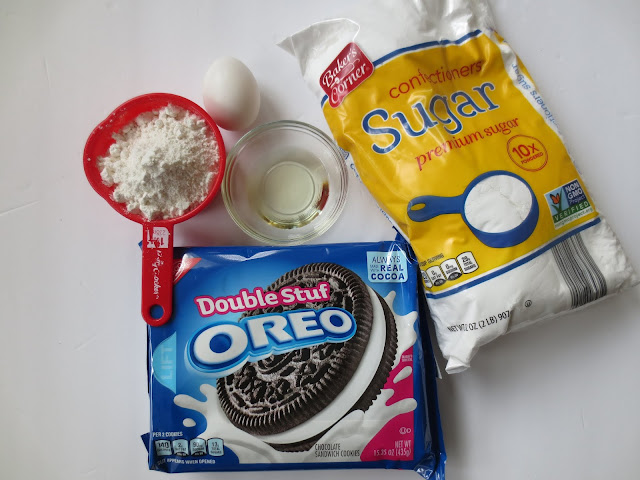
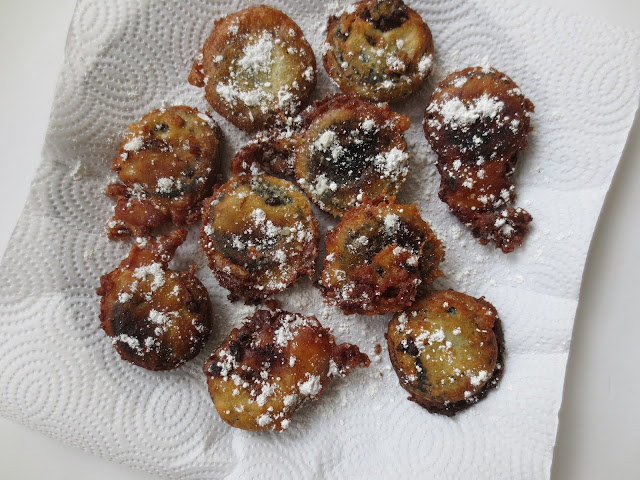
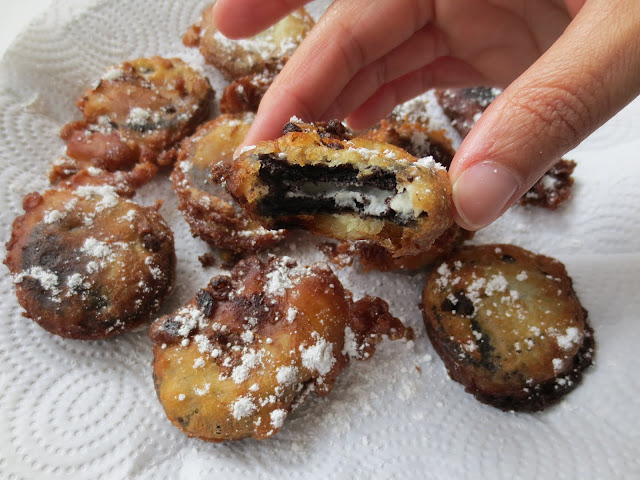
I have been wanting a deep fried Oreo for years! Every time I would go to an amusement park or fair the stand for deep fried Oreos wasn't open. I was so intrigued about these deep fried Oreos I said "I'm going to make them myself from home" I was surprised at how little bit of ingredients to make them. Here is everything you need:

This is it! (Plus the milk I forgot to put in the photo) 
-Pack of Oreos
- 1 Cup Pancake Mix
-2/3 Cup of milk (pictured below)
-1 egg
-1 1/2 Teaspoon vegetable oil
-Confectioner Sugar (To sprinkle on top when the Oreos are finished)
This is all you need to make deep fried Oreos at home. Place all of the ingredients into a bowl and make a nice batter to dip the Oreos. 
My batter was a little thin so I added some more pancake mix to make it just a tad more thick but not too thick. Add the milk a little at a time so you can get the batter exactly how you would like it. Here is the fun part...Dip your Oreos with a slotted spoon and put them in the hot oil.
I used the deepest pan I have to fry in. Make sure you have enough oil in the pan to almost immerse the Oreo. They cook extremely quick so make sure to turn them quickly after about a minute or two. It's very similar to how funnel cakes cook and taste.
Take them out put them on a plate with paper towels. Sprinkle the confectioner sugar on top and enjoy!
They turned out amazing! I ate all 12 (That's not good) but that is how good they were. I can't wait to do these with family because it reminds me of carnival/fair/amusement park food and I think it makes for a good time with a group of people. Make sure to give these a try for your next game night or gathering. Thank you for stopping by and have a great one!


Today started out like any normal day. I blogged, filmed some videos and got most of my online work done. I go to edit the video in the afternoon on my iPad and that was a no go it said "Not enough space" so I say no problem I'll edit on my iPhone and I got the same message "Not enough space" I deleted alot of apps and pictures and no matter what I did it still read "Not enough space" This was only 7GB for the two video clips. Any other time my storage balances back to about 13 or 14 GB this time it jumped to 22 GB it cuts me off around 23-24 GB so there was no way I was uploading this You Tube video. I wasn't happy about this at all.
So now I'm livid! I haven't uploaded a video in almost a month and uploading to You Tube is one of my top creative outlets. It has been one of my most enjoyable creative outlets (besides blogging :) So now I'm on the hunt to see what programs I can use. My computer is not the top of the line I only have like 8 ram or something like that lol. I was looking for online editors you don't have to put on your computer and I found Veed.io which I may try next but in the middle of this search I found gold! A guy explains there is a free video editor inside of Windows 10. I just got my laptop a month or so ago and I have Windows 10. I looked in the search bar and there it was. I went from being tired to extremely excited. I got up made a quick two clip video and put it in my computer.
Windows 10 video editor is very simple and beginner friendly. I was able to put a video together with a beginning, middle and end  with backround music in about 30 minutes. The splits are not as sharp as iMovie but they can work. Overall I'm giving the program 5 stars because it did what I needed done without the computer glitching or dying on me (which both have happened before with other editing programs) The export was quick. I exported my file to the desktop of my computer in under 5 minutes (this was a 6 minute video) 
I'm very happy I learned to do this within 1 hour. I wasn't going to let it rest until I was able to upload a YouTube video. I'm glad I was pushed in the corner to learn to video edit with something else other than iMovie. I will be looking for video editing alternatives even if they are paid as long as it's low cost it might be worth it. Check out the actual video below that I edited on Windows 10 for free!


Thank you for stopping by! Hoped you learned something new because there is always more than one way to skin a cat (My age is truly showing) Have a good one and come back now ya hear!


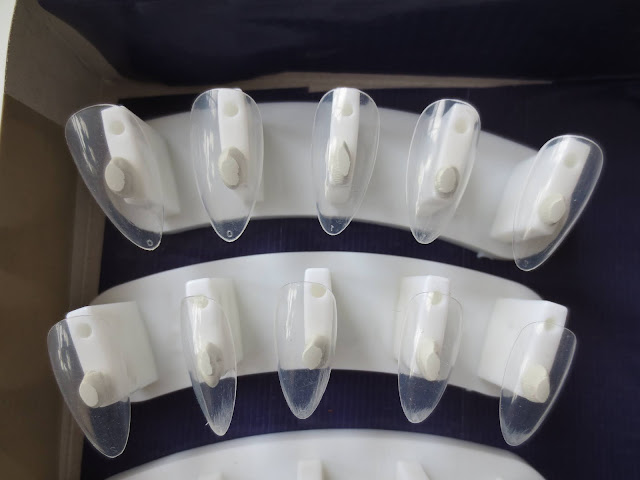
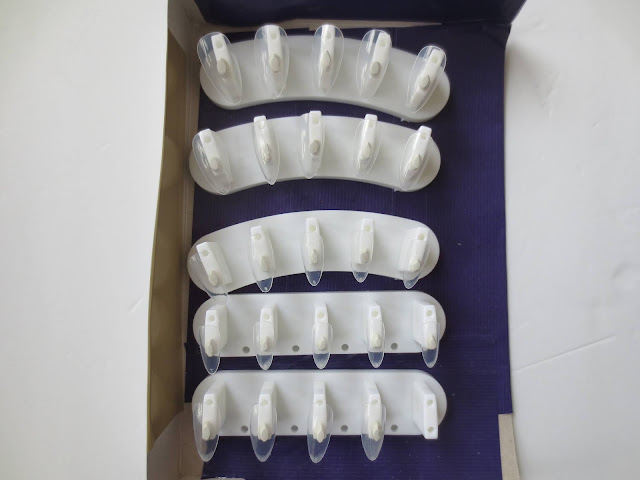
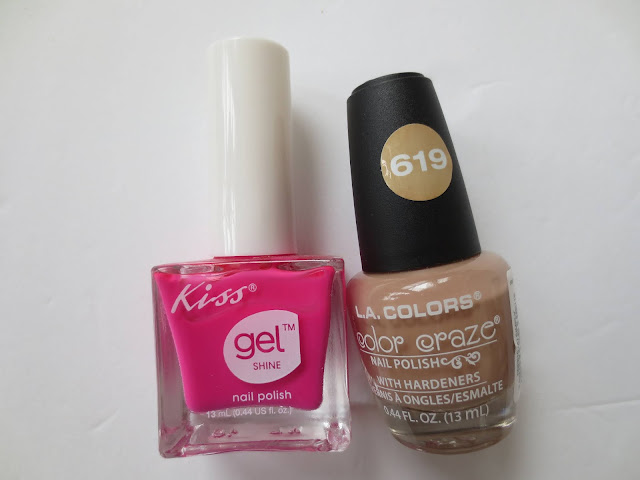
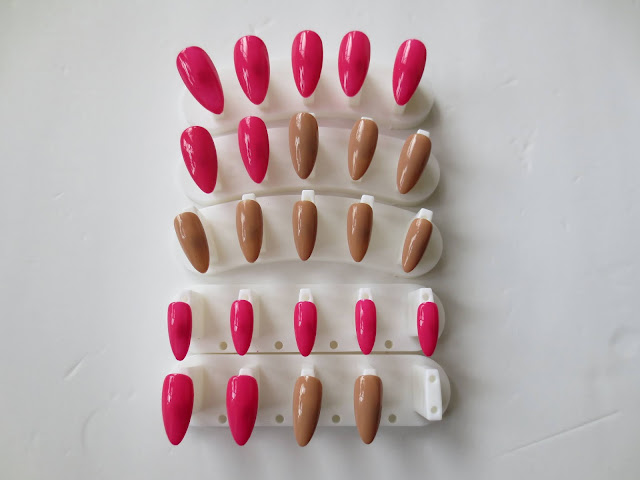
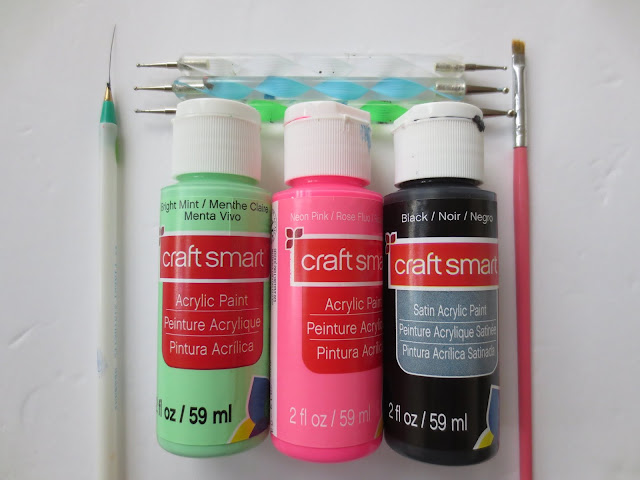
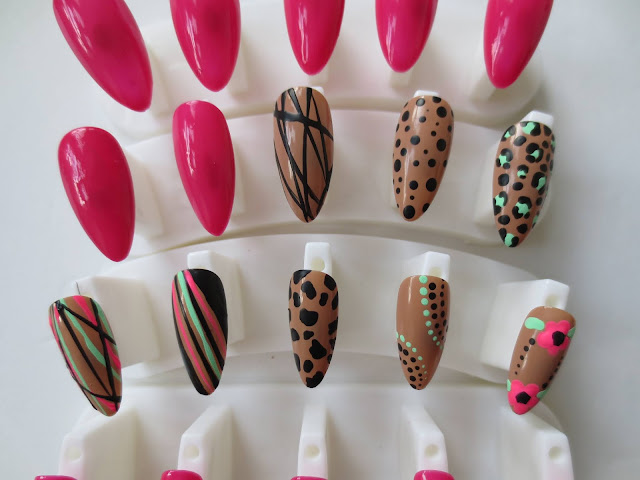
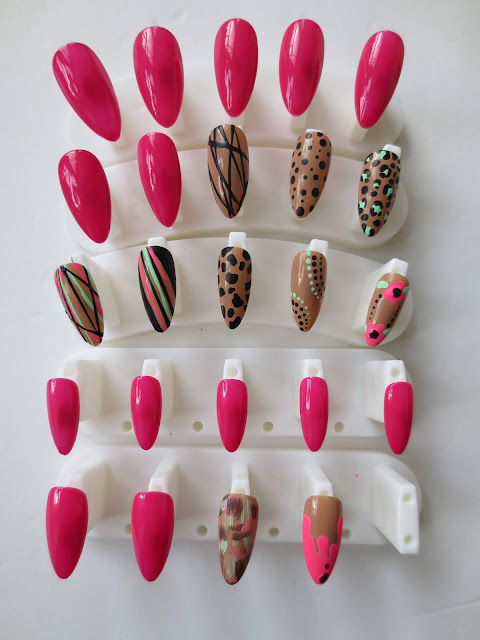
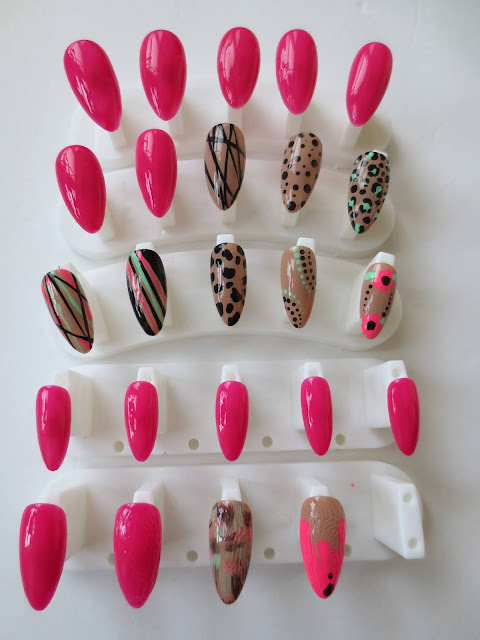
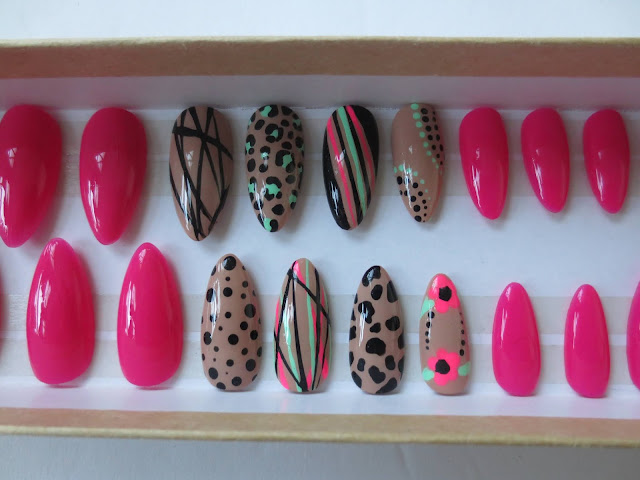
 Doing custom press on nails from home is extremely easy. All you need is any shape of press on nail (make sure they are full cover) Any type of nail stand, and some type of sticky putty to attach the press on nails.

Take your sticky putty and put your press on nails on your stands. These are for a (24) set of custom nails to be sold later on. You can also do these just for yourself or for friends and family.
To keep them all together while designing them I cut a gift box from The Dollar Tree in half and made it strong with some colored duct tape. It just makes it easier when cmoving multipe sets of  press on nails around.
Now that your press on nails are set up and ready to be painted it's time to pick out your nail polish colors. I'm going with a combination of pink and tan.
My colors of nail polish chosen are: Kiss Gel Shine Nail Polish in DTGNP06 and L.A. Colors Color Craze Nail Polish in a shade of  "Simply"
I chose to do some press on nails in the pink shade and some nails in the tan shade of nail polish. The tan press on nails will be designed with acrylic paint and some nail art brushes and tools.
The acrylic paints are from Michaels by Craft Smart. I also have a liner brush, angle nail art brush and dotting tools that I will be making various nail art designs on each press on nail with.
As the nail art is being done the acrylic paint will dry depending on how thick you put the acrylic paint on. You will know it's dry when it looks like chalk and is dry to the touch.
I let the press on nails dry for about an hour just to make sure there is no smudging or smearing when I apply the topcoat.
I'm big on this Poshe Super Fast Drying Topcoat. I apply two coats to all of my press on nail sets.
After the press on nails have two coats of Poshe topcoat on them I let them dry for a couple hours before I put them in a box. If possible letting them dry for (24) hours would be ideal but if thats is not possible at least a couple hours.
After you have let the press on nails dry they can placed in a box for storage yourself, a friend or shipped to a customer. In a few easy steps you can have custom press on nails to keep, gift or sell. 

Leave some color combinations or nail ideas if you have any to share! Thank you for stopping by make sure to come back!
👄👄👄👄👄👄👄👄👄👄👄👄👄👄👄👄👄👄👄👄👄👄👄👄👄👄


 I was looking at this wig for the longest and didn't know whether I wanted to order a wig that long or not. I got some Amazon gift card rewards and decided that was my chance. Yes! You guessed it I'm a frugal person, a cheapskate, a penny pincher... whatever you want to call me it's fine just know that I know how to save a buck. So this wavy glue less lace front wig is about 26 inches which is to date one of the longest wigs I own.


I was very excited to receive this wig unit in the mail from Amazon. The wavy wig retails for about $39.00 and is well constructed. In the pictures of course I already cut the lace off at the edges. The cap was nice and snug and it has two straps in the back of the lace front wig. Plus combs to secure the wig at the front and in the back.

I liked the versatility of the natural long lace front wavy wig. I wore it more dry for more of a wavy hair style but if you add a good amount of water the lace front wig becomes wet and wavy which is a nice option if you want to go for another type of style.
This particular wavy lace front wig is pre-plucked which I like because I'm not good at plucking the wigs at the front. There was also a little baby hair to play with in the front. The entire wavy lace front wig is synthetic but is also heat resistant (low heat can be used on the wig)

I'm usually not a huge fan of black wigs but because this one was long and luscious I said "that's what wigs are for right... to wear hair you don't have" So in this case it worked out very well. The wig unit really surprised me when it came to styling into and up do look. It was constructed very well and you can definitely pull off a ponytail in this wavy lace front wig.
I like the just rolled out of bed messy look and as you can see this hairstyle can be achieved with this wig. It's been a while since I orded this natural wavy lacefront wig from Amazon so I dont remember the seller. Here is the YouTube video below I'm sure I mentioned more details about this wig and you can see the wig unit in action. 

Thank you so much for visiting my blog! Stay positive, have a good one and come back and see me sometime lol!


 I'm all about some DIY projects. So when I was thinking about changing my video backdrop/ background in my recording room for YouTube I thought about the popular organic balloon garlands I keep seeing online and on Instagram. I used to work at a party store for years blowing up balloons on a daily so I thought this would be a fun DIY balloon project. I got a balloon pump from Ebay, table cloth from The Dollar Tree and the balloons are both from The Dollar Tree and Ebay.

I had a ball blowing them up with the hand pump! There was no design I just blew up all the colors and bunched them together. There was a pack of (6) Confetti balloons from The Dollar Tree that were great accents in the bunches. The balloons were one big garland and then I messed up and put some strong double sided tape on them and it made the middle pop. Which ended up being cool because I ended up with two clusters. One for each side of me.
I was very impressed with the outcome! The two clusters on both sides of me while I sit in the middle for videos or pictures. The table cloth was black which really made the colors pop out. This can also be done for parties as well. 
Very cool DIY balloon backdrop/background that cost me very little but gave off a great look on camera and for photos. I have a couple more ideas with balloons for future backdrops. If you want to see the full video on Youtube of how I put this together with all my shenanigans included click below:
Thank you so much for reading and stopping by! Hope you got some balloon ideas flowing for your next at-home project. Have a great one!