
I'm all about some DIY projects. So when I was thinking about changing my video backdrop/ background in my recording room for YouTube I thought about the popular organic balloon garlands I keep seeing online and on Instagram. I used to work at a party store for years blowing up balloons on a daily so I thought this would be a fun DIY balloon project. I got a balloon pump from Ebay, table cloth from The Dollar Tree and the balloons are both from The Dollar Tree and Ebay.


I'm all about some DIY projects. So when I was thinking about changing my video backdrop/ background in my recording room for YouTube I thought about the popular organic balloon garlands I keep seeing online and on Instagram. I used to work at a party store for years blowing up balloons on a daily so I thought this would be a fun DIY balloon project. I got a balloon pump from Ebay, table cloth from The Dollar Tree and the balloons are both from The Dollar Tree and Ebay.
This is one of my favorite quick bean salads I make when I need to prep some food to last a couple days. Dairy-free garbanzo bean aka chickpea salad is my favorite because there is REALLY no cook time. Unless you would like to make your garbanzo beans fresh. Mines are out of the can but you can make this with homecooked garbanzo beans and it will be even tastier! Here is everything you need to make this delicious dish!
 I'm just one person so I used one can of garbanzo beans (chickpeas) but feel free to add more if you are making this dish for more people. Black olives, Sweet relish, Plant based Mayo, Yellow Mustard, and red onion (its not pictured here but I added some sliced green olives also.


This is one of my favorite quick bean salads I make when I need to prep some food to last a couple days. Dairy-free garbanzo bean aka chickpea salad is my favorite because there is REALLY no cook time. Unless you would like to make your garbanzo beans fresh. Mines are out of the can but you can make this with homecooked garbanzo beans and it will be even tastier! Here is everything you need to make this delicious dish!
I'm just one person so I used one can of garbanzo beans (chickpeas) but feel free to add more if you are making this dish for more people. Black olives, Sweet relish, Plant based Mayo, Yellow Mustard, and red onion (its not pictured here but I added some sliced green olives also.I did it again! I was able to scoop four colors of nail polish from The Dollar Tree all Sinful Colors brand! I'm super excited because its very rare to see Sinful Colors nail polish in The Dollar Tree. Sinful colors nail polish is usually in a store like Sally's or a higher priced beauty store. I was also impressed with the shades I picked up. Usualy the colors all look alike or they are dull and unwanted but these colors are POPULAR!.


I did it again! I was able to scoop four colors of nail polish from The Dollar Tree all Sinful Colors brand! I'm super excited because its very rare to see Sinful Colors nail polish in The Dollar Tree. Sinful colors nail polish is usually in a store like Sally's or a higher priced beauty store. I was also impressed with the shades I picked up. Usualy the colors all look alike or they are dull and unwanted but these colors are POPULAR!.
You can create easy nail art with a couple tools that will make you look like a professional. For this demonstration I'm going to use some acrylic paint you can find at Michaels, Walmart, Hobby Lobby, Jo Anns craft store or even online, A dotting tool (Can be found online or at a beauty store like Sally's), An old toothbrush (Not the same one for your teeth and a long line brush (usually found in a cheap nail art brush set)

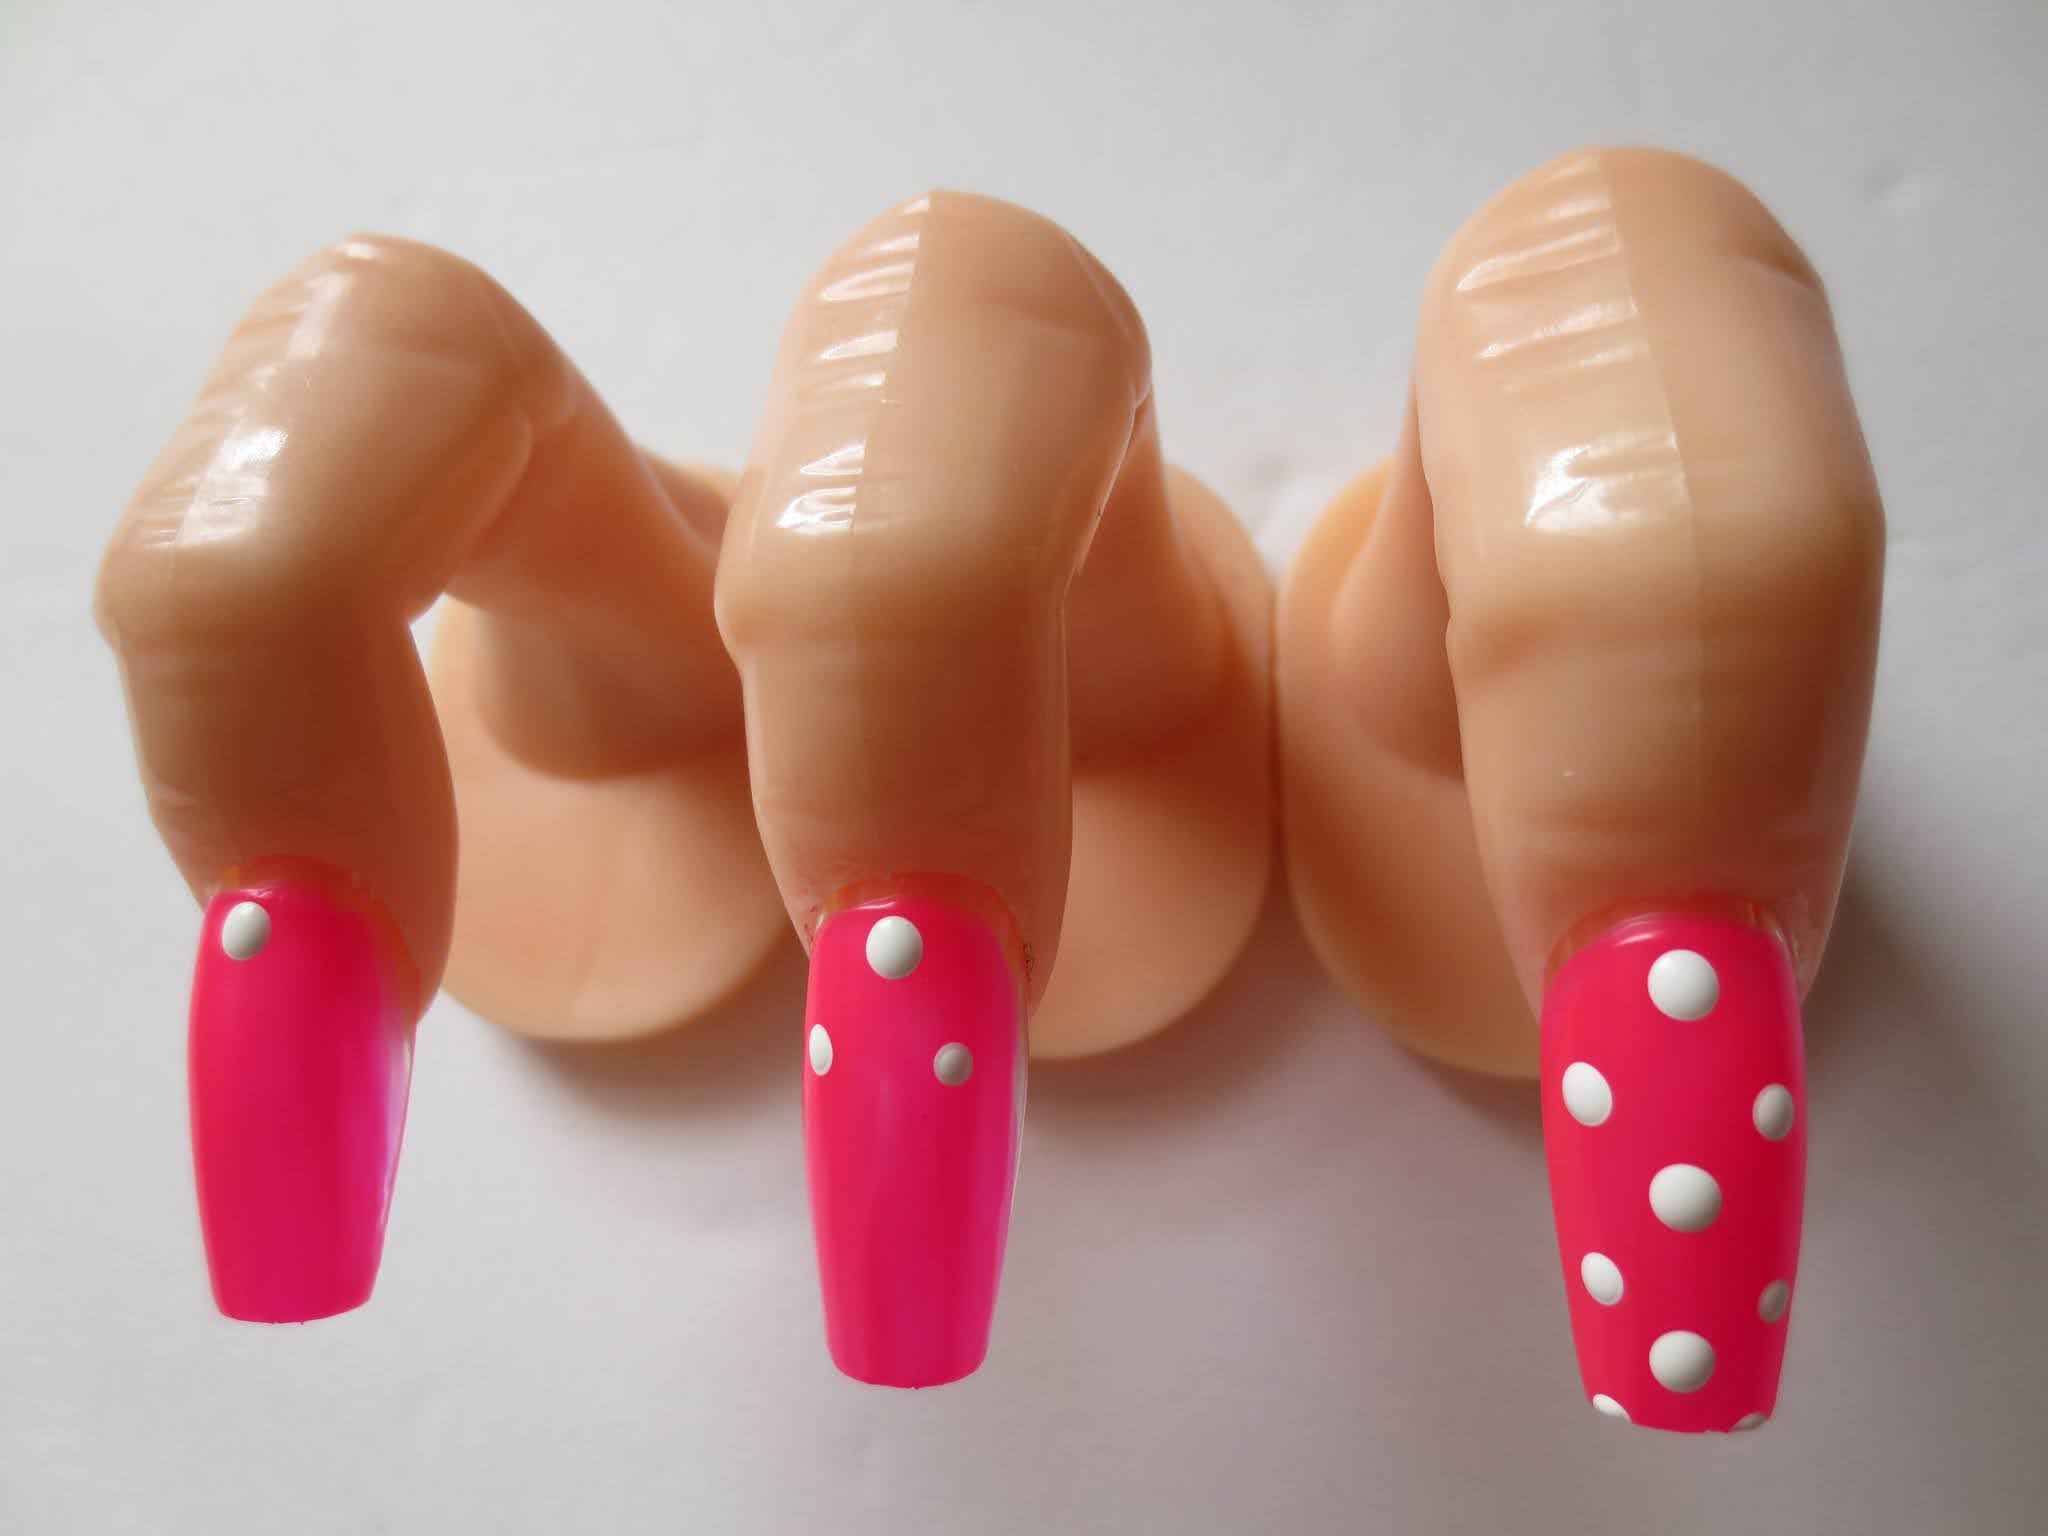


Happy Nail Designing!

You can create easy nail art with a couple tools that will make you look like a professional. For this demonstration I'm going to use some acrylic paint you can find at Michaels, Walmart, Hobby Lobby, Jo Anns craft store or even online, A dotting tool (Can be found online or at a beauty store like Sally's), An old toothbrush (Not the same one for your teeth and a long line brush (usually found in a cheap nail art brush set)
Happy Nail Designing!
This is my D.I.Y recipe for shaving lotion. I've used this recipe for years and years and I haven't had any cuts since I start making it. I used to buy shaving cream and I would be cut a couple times by the time I got done shaving my legs. With this DIY shaving lotion I never had that problem.


This is my D.I.Y recipe for shaving lotion. I've used this recipe for years and years and I haven't had any cuts since I start making it. I used to buy shaving cream and I would be cut a couple times by the time I got done shaving my legs. With this DIY shaving lotion I never had that problem.


Social Icons