You can create easy nail art with a couple tools that will make you look like a professional. For this demonstration I'm going to use some acrylic paint you can find at Michaels, Walmart, Hobby Lobby, Jo Anns craft store or even online, A dotting tool (Can be found online or at a beauty store like Sally's), An old toothbrush (Not the same one for your teeth and a long line brush (usually found in a cheap nail art brush set)
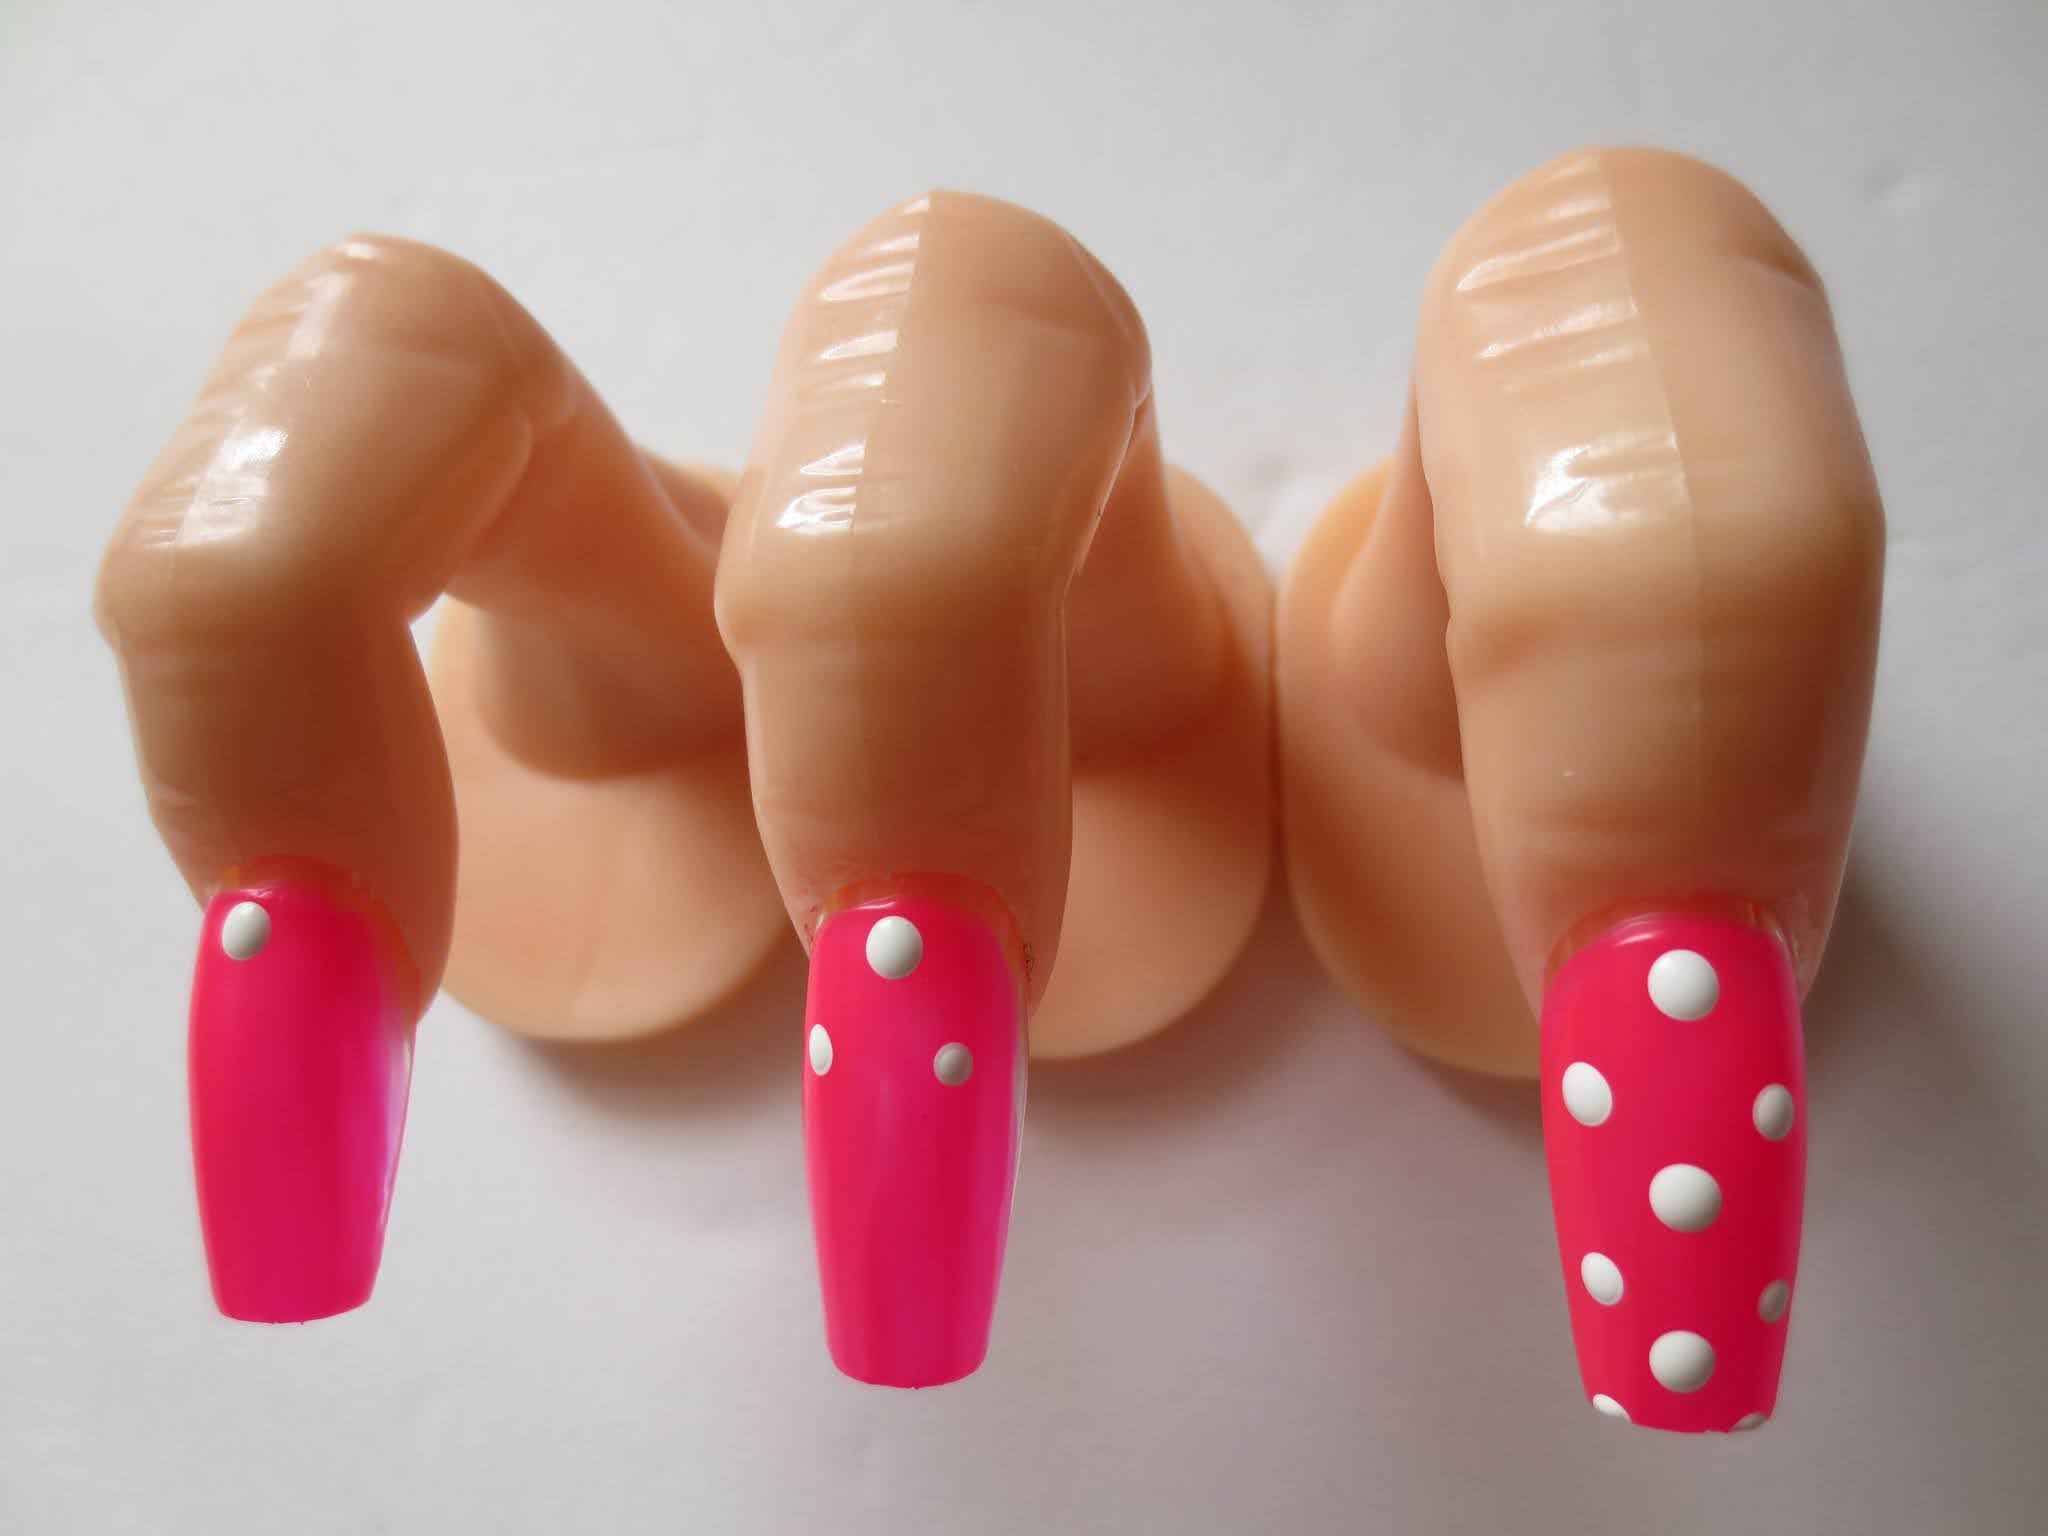
First white dot design is super easy. I'm using a practice finger with a nail tip inserted. I painted the nail tip pink and started with one white dot. Next place two white dots above it and repeat that pattern until there is no more room for anymore dots.
Put top coat over it and now you have an easy peasy dot pattern you can do on all types of nails or just one accent nail.
The second nail design is one of the most simple designs I've ever seen. Your going to take an old tooth brush dip the tip of the toothbrush into your desired acrylic paint and keep dabbing on the nail until you get the look you like.
Let it dry and put your desired topcoat over it and be proud of your one of a kind toothbrush design.
I saved the geometric lines for last because this is the most challenging for a beginner with little to no nail art skills. Take your thinnest line brush dip it in the acrylic paint make sure to test your lines on a piece of paper or cardboard to make sure the lines are smooth and thin. Start with two sets of lines on one side of the nail then another two lines on the opposite side of the nail. Lastly start creating lines going thru the other lines. Now you have a geometric line nail.
Apply topcoat over the top and WALA you made a geometric nail design.
All these nail designs and simple and with acrylic paint the designs are unlimited. Make sure to let your acrylic paint dry completely before applying the topcoat. You will know it's dry when it's a flat color and looks like chalk.
Thank you for stooping by! If you would like more nail art tutorial blogs let me know in the comments!
You can create easy nail art with a couple tools that will make you look like a professional. For this demonstration I'm going to use some acrylic paint you can find at Michaels, Walmart, Hobby Lobby, Jo Anns craft store or even online, A dotting tool (Can be found online or at a beauty store like Sally's), An old toothbrush (Not the same one for your teeth and a long line brush (usually found in a cheap nail art brush set)
First white dot design is super easy. I'm using a practice finger with a nail tip inserted. I painted the nail tip pink and started with one white dot. Next place two white dots above it and repeat that pattern until there is no more room for anymore dots.
Put top coat over it and now you have an easy peasy dot pattern you can do on all types of nails or just one accent nail.
The second nail design is one of the most simple designs I've ever seen. Your going to take an old tooth brush dip the tip of the toothbrush into your desired acrylic paint and keep dabbing on the nail until you get the look you like.
Let it dry and put your desired topcoat over it and be proud of your one of a kind toothbrush design.
I saved the geometric lines for last because this is the most challenging for a beginner with little to no nail art skills. Take your thinnest line brush dip it in the acrylic paint make sure to test your lines on a piece of paper or cardboard to make sure the lines are smooth and thin. Start with two sets of lines on one side of the nail then another two lines on the opposite side of the nail. Lastly start creating lines going thru the other lines. Now you have a geometric line nail.
Apply topcoat over the top and WALA you made a geometric nail design.
All these nail designs and simple and with acrylic paint the designs are unlimited. Make sure to let your acrylic paint dry completely before applying the topcoat. You will know it's dry when it's a flat color and looks like chalk.
Thank you for stooping by! If you would like more nail art tutorial blogs let me know in the comments!


Social Icons